

Back in the day, Mac OS X had a dedicated Dashboard for widgets, where you could add all sorts of nifty little interactive utilities. With the release of macOS Mojave in 2018, Apple finally laid the old system to rest, and did not replace it with anything. Sure, you could add widgets to the Notification Center, but who uses that anyway?
In macOS Sonoma, widgets are so back, and now they sit right on your desktop, like on the iPhone. In fact, they are basically the same widgets as your iPhone. While Dashboard was tucked away when you needed it, the new desktop widgets are always there. Good thing they’re actually useful.
How the new widgets in macOS Sonoma work
The new widgets in macOS Sonoma are built on the same framework as the ones on your iPhone and iPad, so they’ll come in the same size class. Unlike Android, you can’t resize these widgets once you choose the size, but you can customize the contents of a widget from the right-click menu.
All the widgets can be moved around freely on the desktop, or can be snapped to a grid. Simply clicking anywhere on the desktop moves all active windows away, revealing the full desktop. This little gesture already makes widgets more usable.
Once you see all your widgets, you can use your mouse to interact with the components. For example, you can check off an item in Reminders, open a link from the Safari Reading List, start a timer in a time-tracking app, and more.
How to add and customize widgets on macOS Desktop
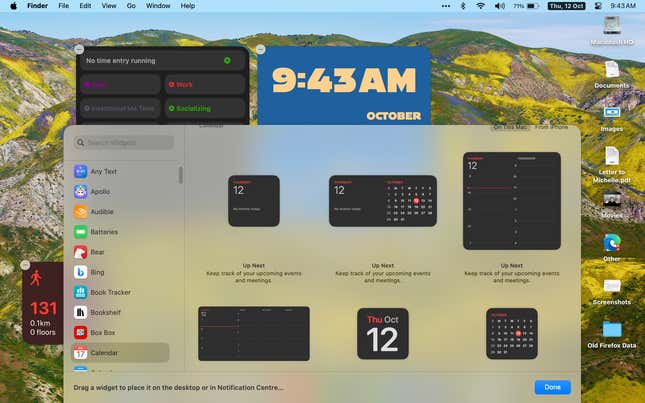
Right-click on any free space on your desktop and choose the new Edit Widgets option. You’ll see a new iPad-style widget picker appear from the bottom of the screen. You can scroll through all available apps from the left sidebar, and you can see all the app widgets in the main area on the right.
Likewise, you’ll find that widgets that you have already set up on your iPhone (using the same Apple account) will show up here automatically, even if you don’t have the app installed on your Mac. This means you can add a custom Widgetsmith widget, or track your steps or fitness, from the Mac desktop.
When you like a widget, simply drag and drop it anywhere you like. When you drag a second widget, Mac will show you a grid pattern that you can pin it to, but you don’t need to adhere to it. You are free to place widgets where you please. After placing a widget, right-click and choose the Edit option to customize the widget. These options will depend on the app, but it’s a good idea to look at this menu when you’re setting up. You can use the right-click menu to delete widgets as well.


